Reference: 2020-1-FR01-KA227-SCH-095534
LAST UPDATE: March 29th, 2023
Presentation
The aim of our participation in this Erasmus + project is to build an interactive virtual museum. We will provide several VR scenes with interactive geometrical activities related to the artwork by the participants of this project. Some of these are based on 2d artwork, which can easily be extended to 3d thanks to the VR environment and the available DGS tools, allowing more possibilities for students and expanding their creative capacity.
All activities contain concepts and mathematical thinking, through dynamic constructions that are either predetermined in the scene, or they are shown a video of how to build and interact with them.
Activities of the project will be accessible by touching the cube Erasmus in the VR scene, as explained in the brochures.
Preparation
In the first sessions with your students, it is recommended to follow some steps detailed in the new user guide:
- Update the software.
- Casting to a PC or phone.
- Set the player settings. Change your Player name.
- Login with your username and password of the website https://www2.ual.es/neotrie.
- Choose your appropriate License to have less or more tools available, depending on the activity.
Introductory session
- First steps: Learn how to move in the scene and use the hand actions to create vertices and edges, faces, edit positions, move and rotate figures, enlarge the figures, delete parts, extrude to have prisms and pyramids, draw freely, redo deletions, moves and rotations, and change of colours.
- Learn the options of the quick access menu.
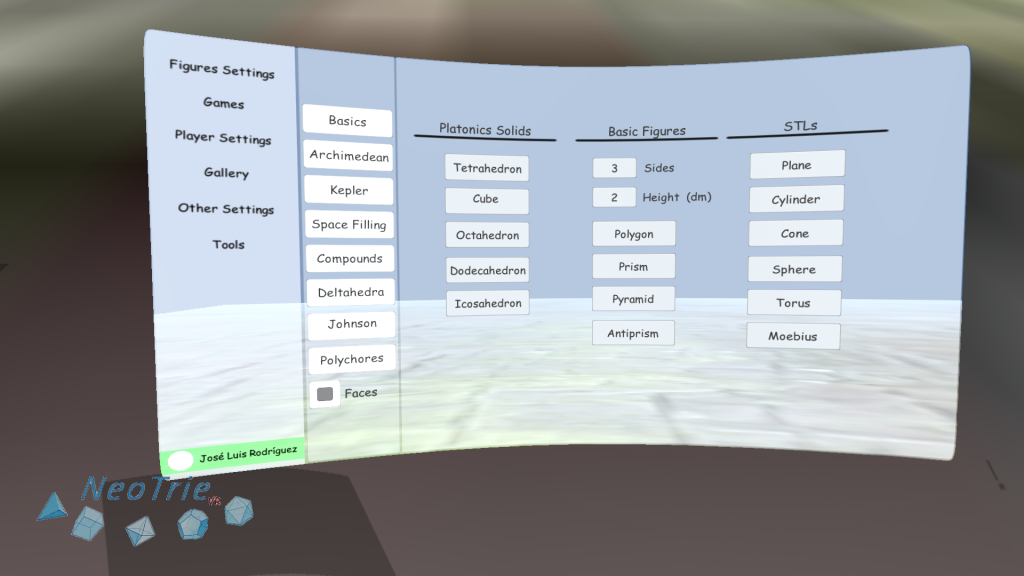
- Information of figures
- Gallery of figures
- Fly/teleport
- Figure settings
- Reorder all tools
- Multiplayer access
- Free time to explore other tools and options: Tools help panel with videos can be found in the Main Menu.
Basic activities
Here are some suggested basic activities: Print a poster in A3, or A2
- Build a polygon convex non convex or with the shape of a star, and strude it to get a prism or pyramid.
- Use the pencil to paint differently the vertices, edges and faces of a prism. Count them and check the Euler formula (Euler's characteristics =2). Compare with the info given automatically in the Quick access menu.
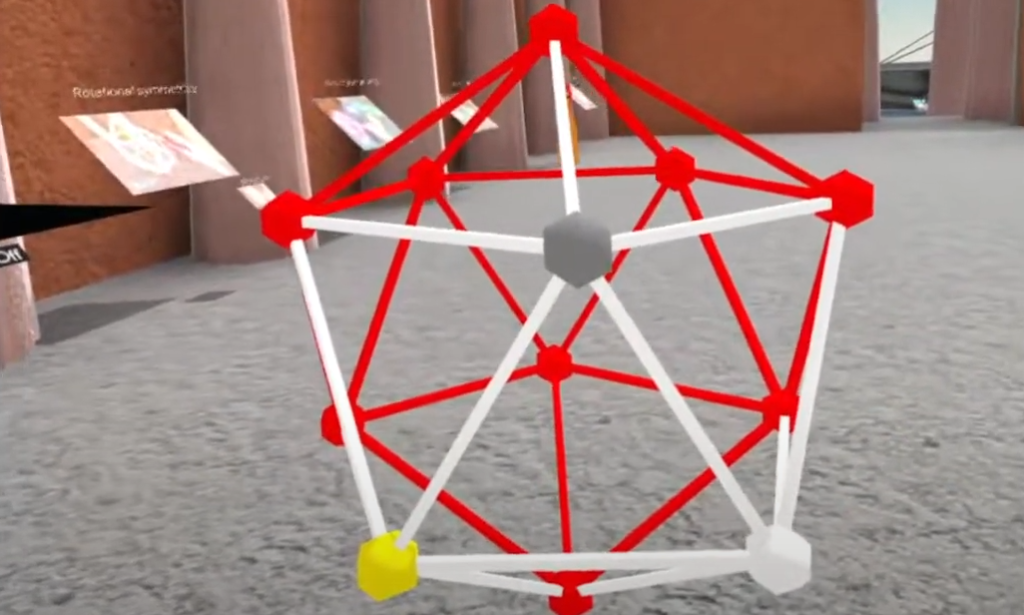
- Download a cube from the gallery figures.
- Use the reflection and rotation tool to transform the cube and see their rotational and planar symmetries.
- Use the middle point tool to get the dual, an octahedron. Try with other Platonic solids by touching only one vertex with the middle point tool.
- (Requires Advanced license) Use the parallel tool (tilling option) to build a frieze, tilling or 3d tilling of a small figure.
- (Requires Advanced license) Use the reflection and rotation tools (tilling option) to get reflected and many rotated copies as desired, at given angles.
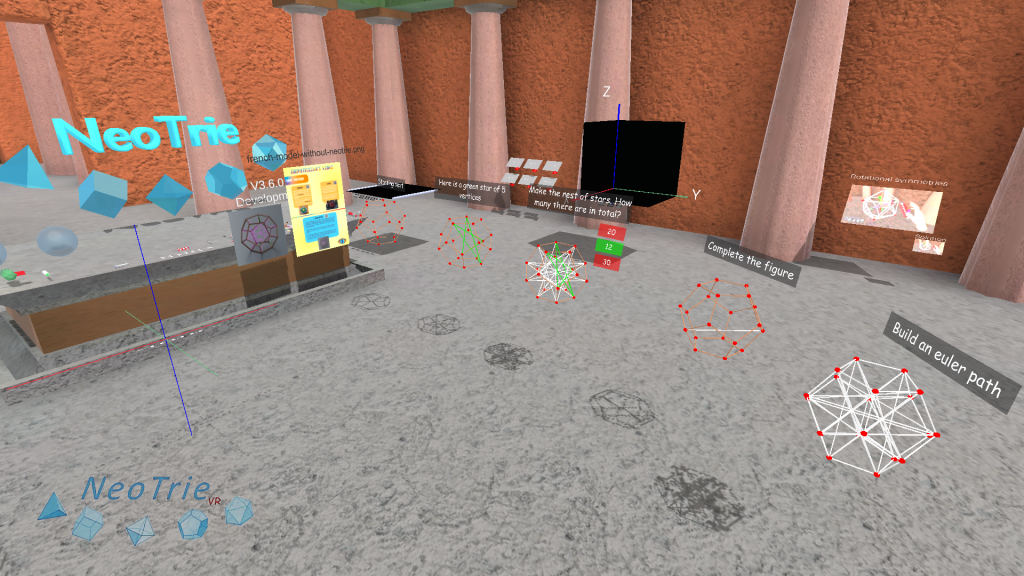
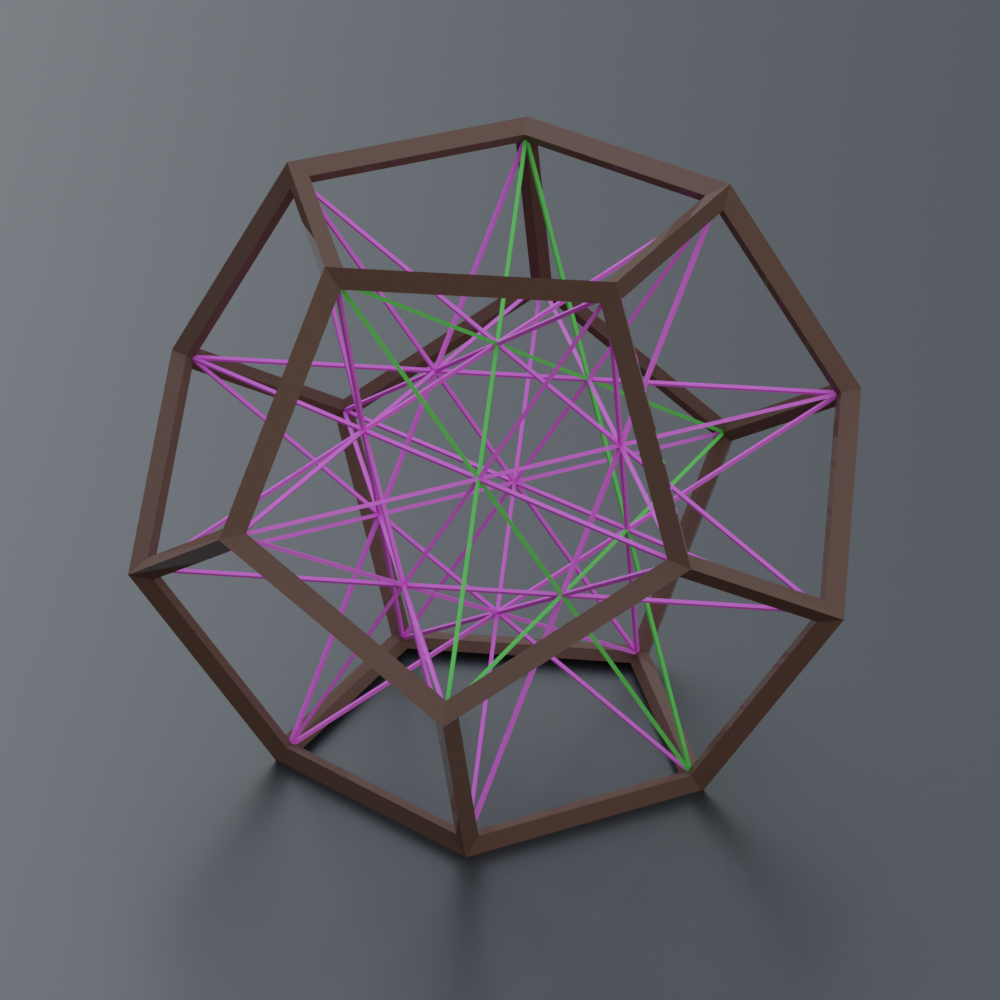
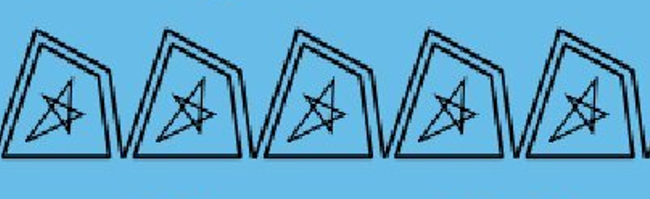
Activity 1: Stellated polyhedron and string art.
Activity 2: Spirals
This activity will contain the construction of the pythagorean, logarithm and archimedean spirals.
Archimedean spiral
Activity 3: Pythagorean fractal tree.
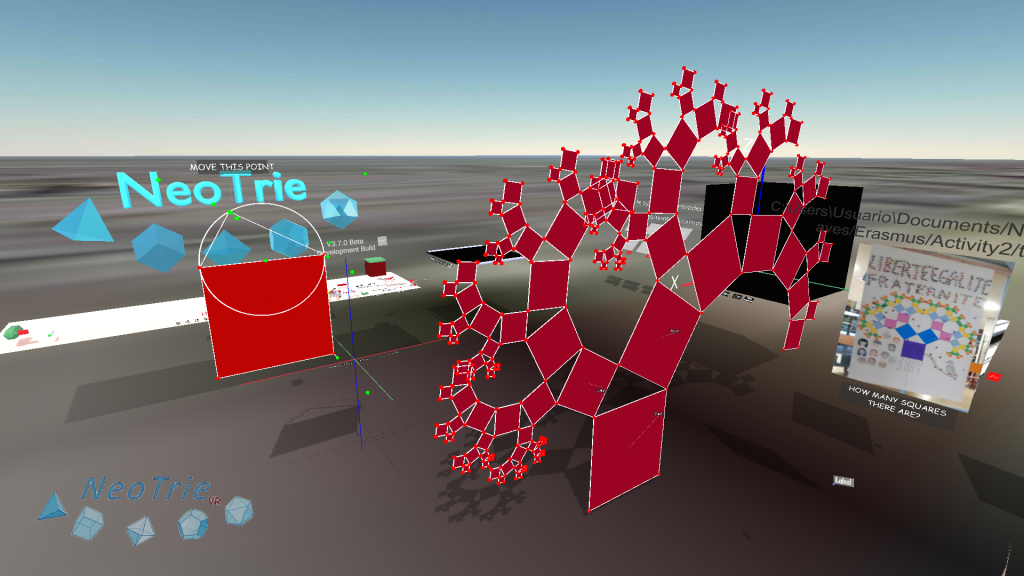
Students can also make this construction by using the fractal tool. To get prepared for this, there is a guide to start making autosimilar fractals in Neotrie, like the Sierpinski triangle. There are several ways to do it. The fastest way is by using the new fractal tool. Have a look at the post, to understand how it works:
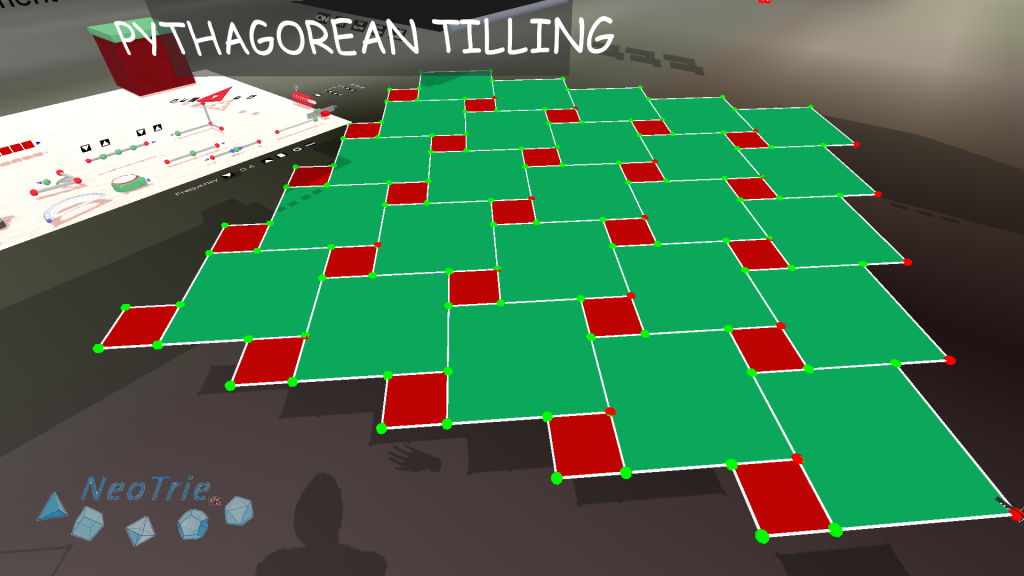
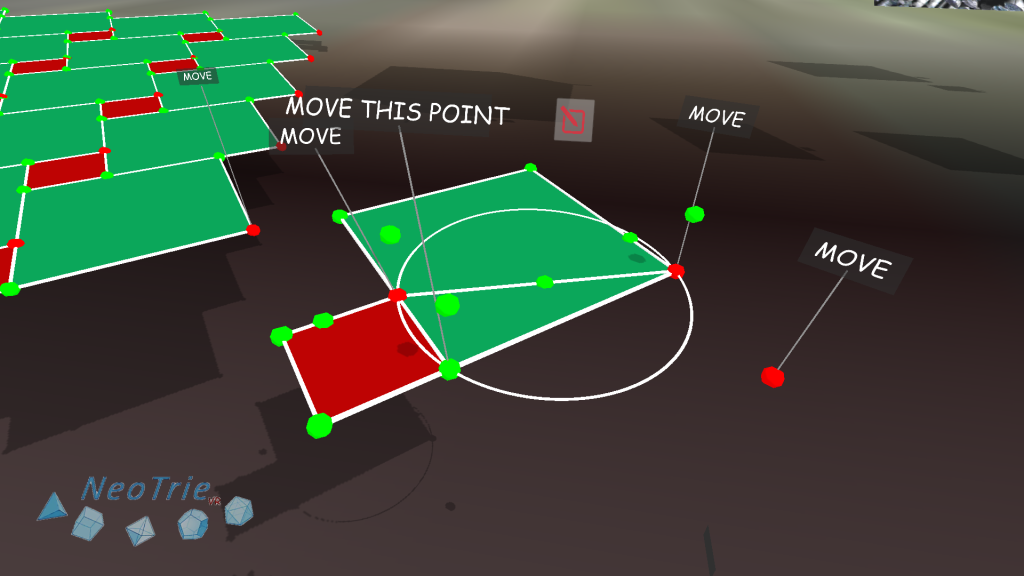
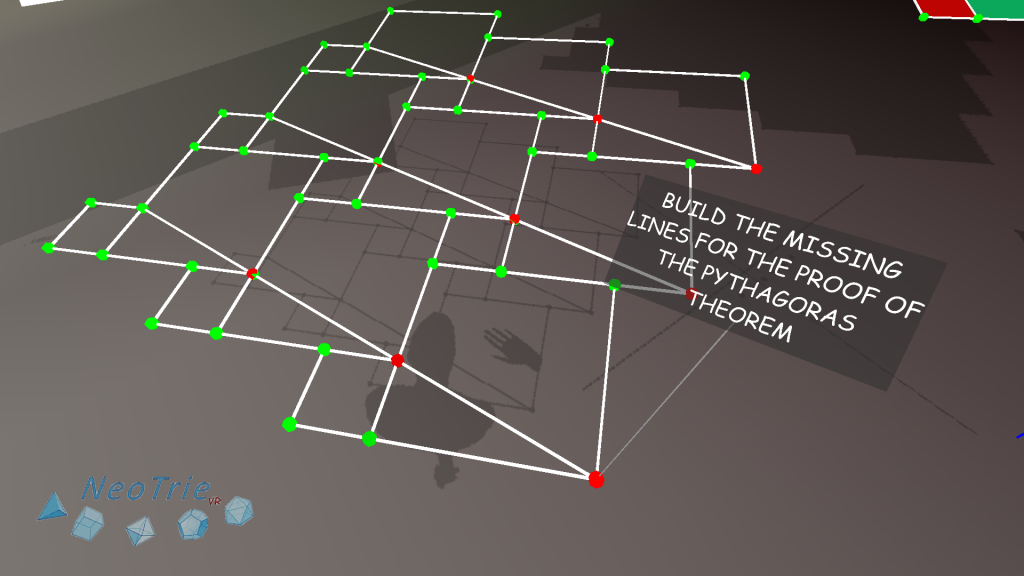
Activity 4: Pythagorean tiling.
This is an interactive activity where students can move the vetices generating this famous tilling, and a related proof of the Phthagoras theorem.
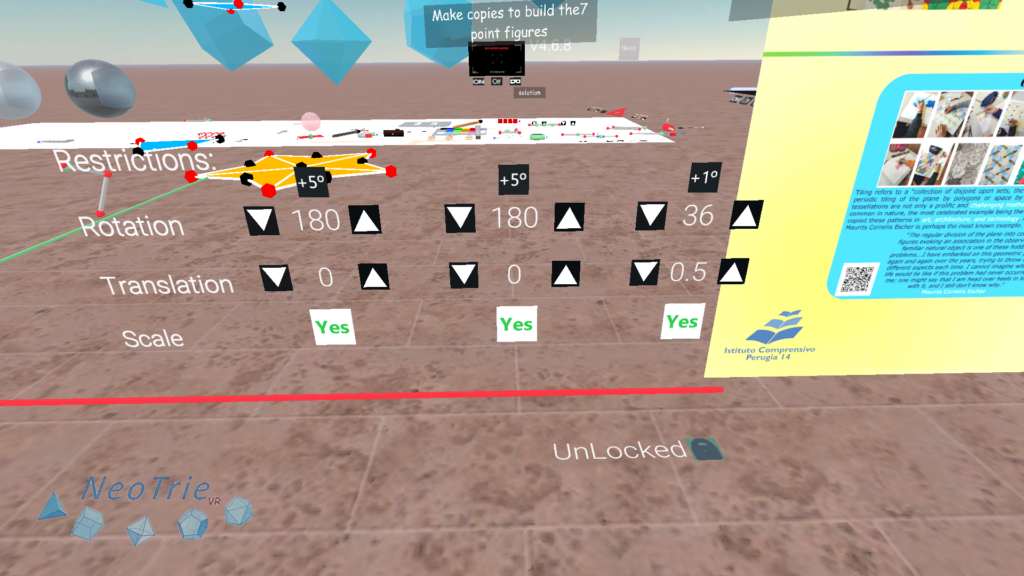
Activity 5: Penrose tilings.
Students investigate in this activity how to build the 7 point figures by using the tools of Neotrie.
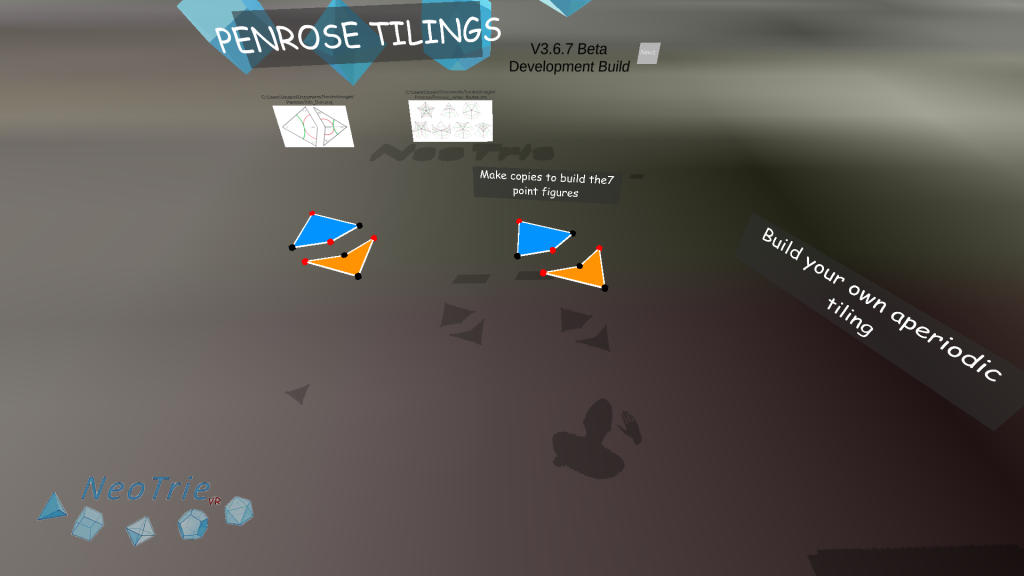
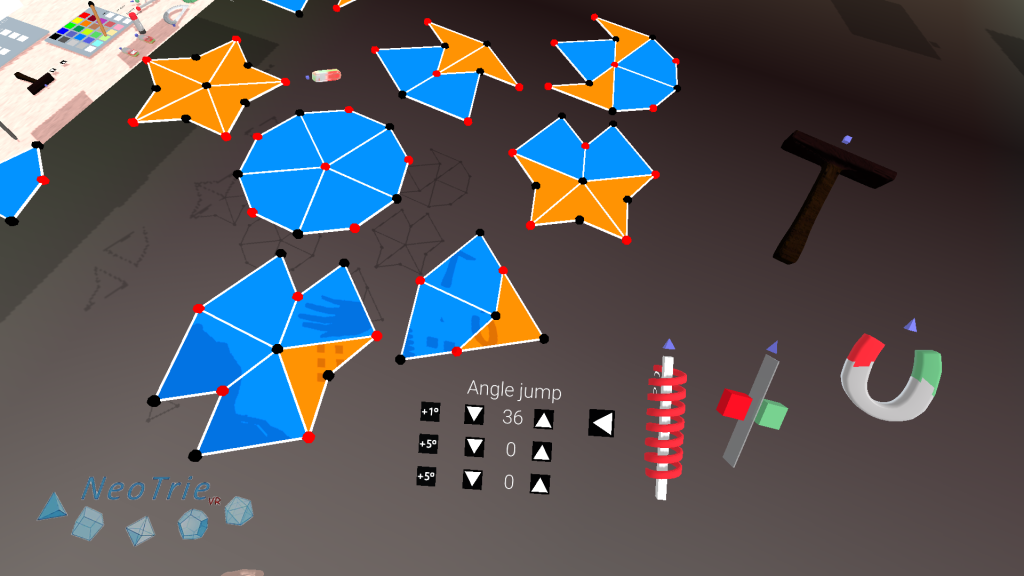
- Create the kite and arrow with the tools available in Neotrie (copy, rotation, reflection).
- Build the 7 possible figures around a point, respecting the glue on the vertices (red and black). Use the rotation tool with angle 36º and marked automatic option. (Other tools can be used too, like the magnet and the reflection tool).
- Build your own Penrose tiling. In the advanced license, one can use the grabbing action of the hands, but be sure to restrict moves on the Z axis (0.4, for example) to keep the pieces on the same plane Z=0, and restrict angles of 180º in the axis X and Y, and 36º in the Z axis.
Use only the "Object mode" in the hand to translate the pieces without grabbing it (no rotation). For that it is recommended to lock the hand modes.
An alternative procedure is to restrict rotations and translations in the axis coordinates, and work with the Grab mode in the hand. This is more intuitive and closer to real pieces.
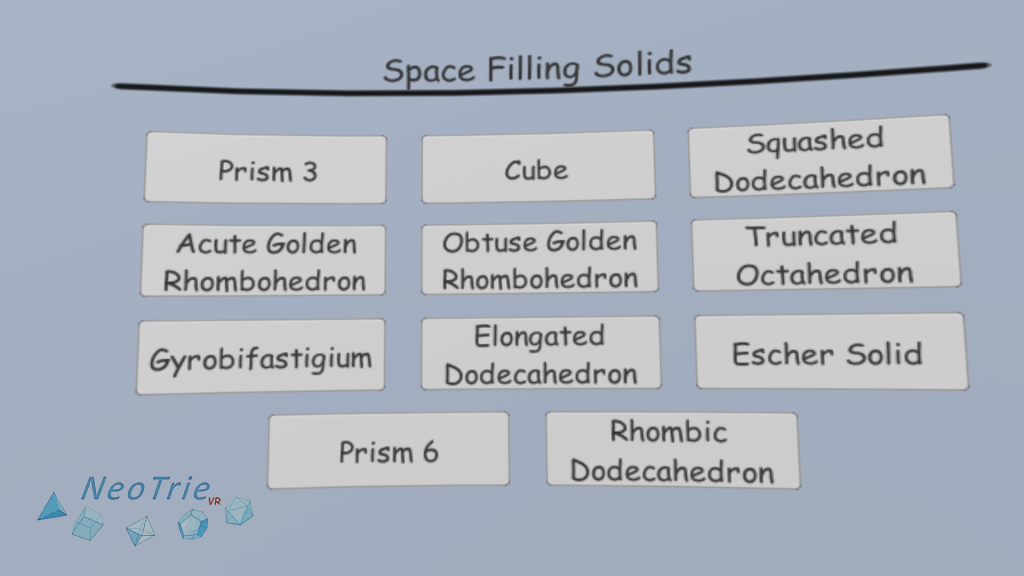
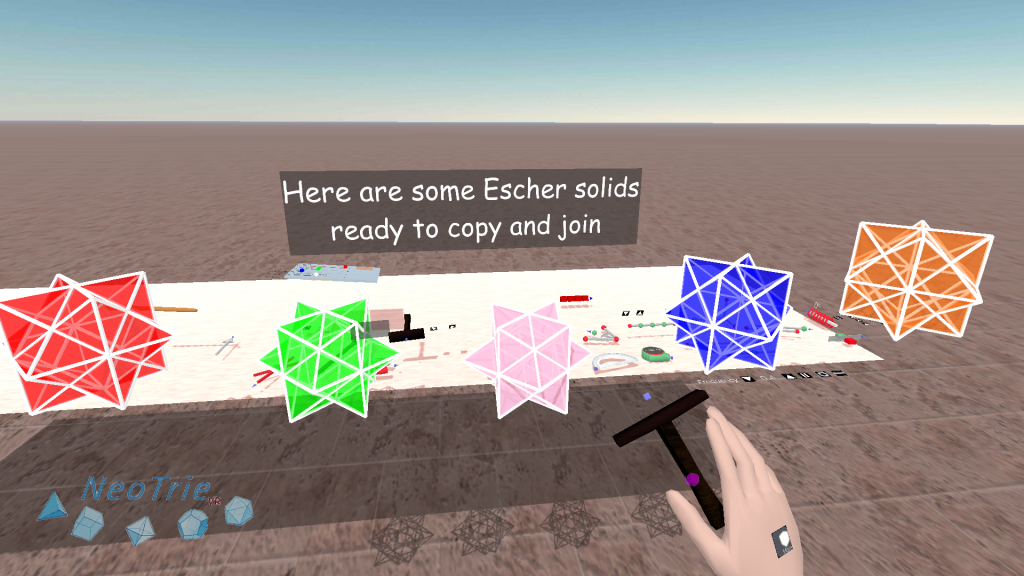
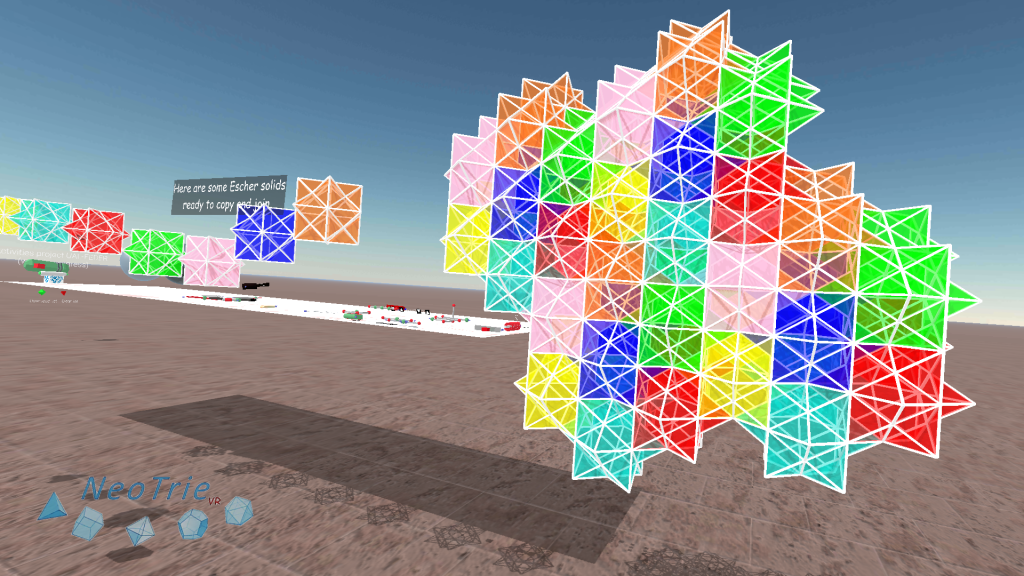
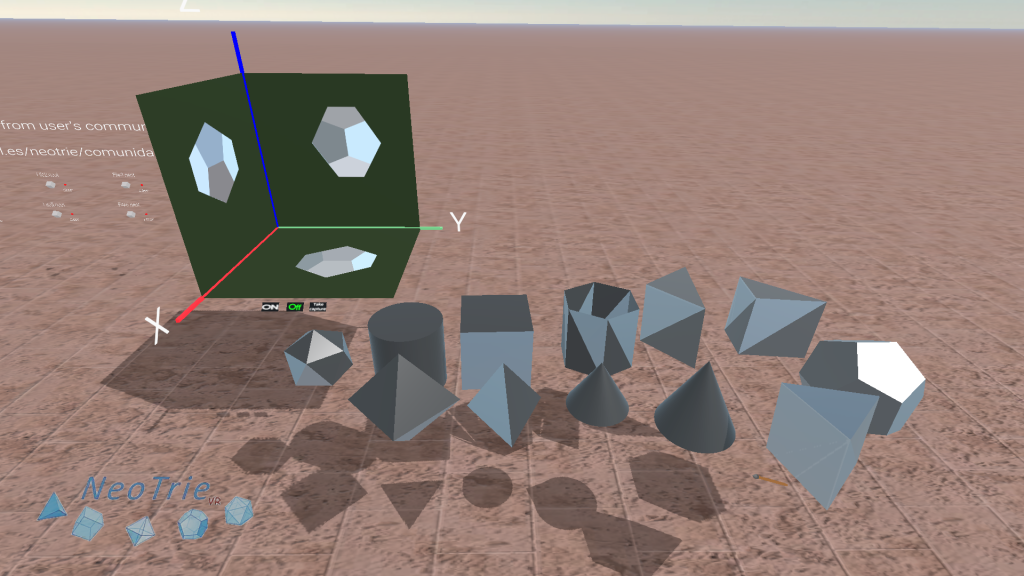
Activity 6: 3d tessellations.
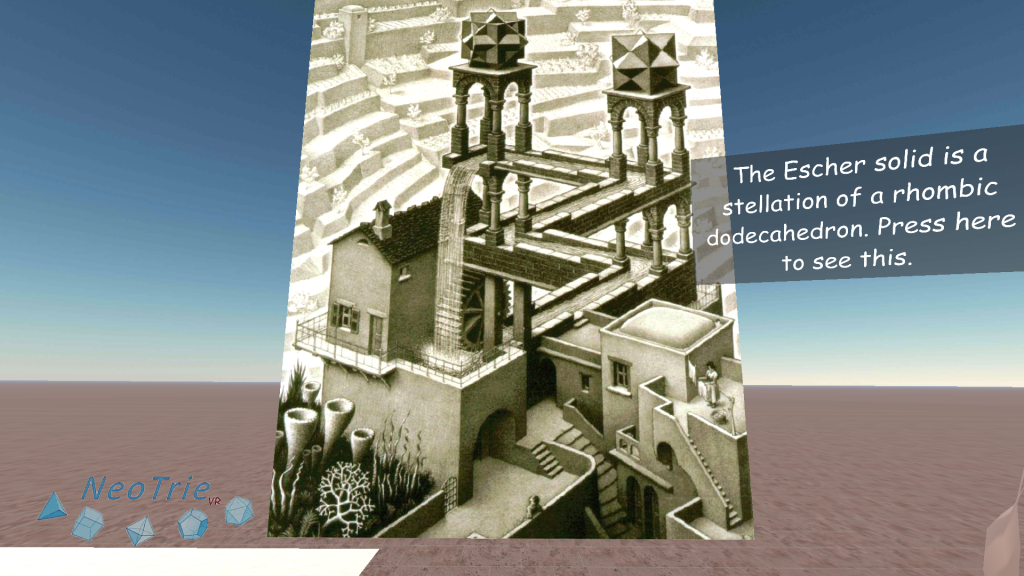
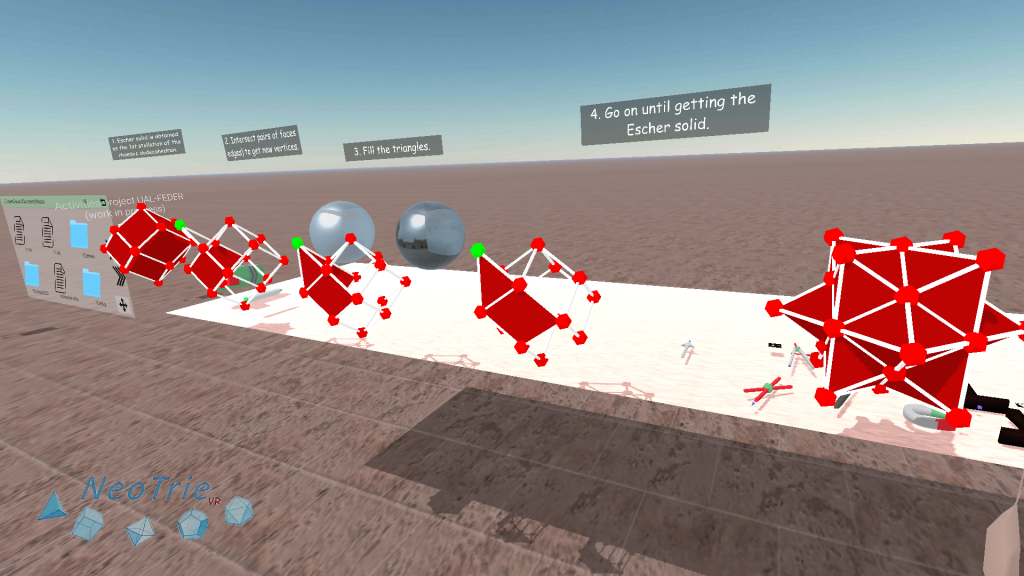
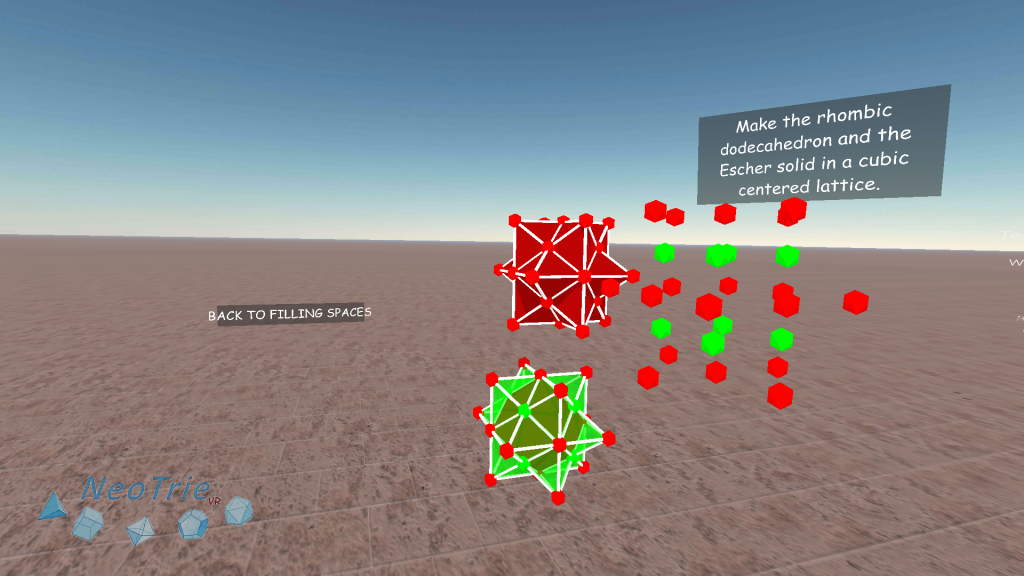
In this activity, students can make 3d tessellations with a filling space polyhedron, like the rhombic dodecahedron or the Escher solid.
In the menu, we choose Gallery>Space Filling
Before, making copies with the copy seal, we can paint the faces as desired.
Then we make individual copies and glue them one by one, or make a copy and glue, and then maintain making copies of the glued figures.
To know more: There are only five space-filling convex polyhedra with regular faces: the triangular prism, hexagonal prism, cube, truncated octahedron (Steinhaus 1999, pp. 185-190; Wells 1991, pp. 233-234), and gyrobifastigium (Johnson 2000).
Visit the Mathworld Wolfram page for more information.
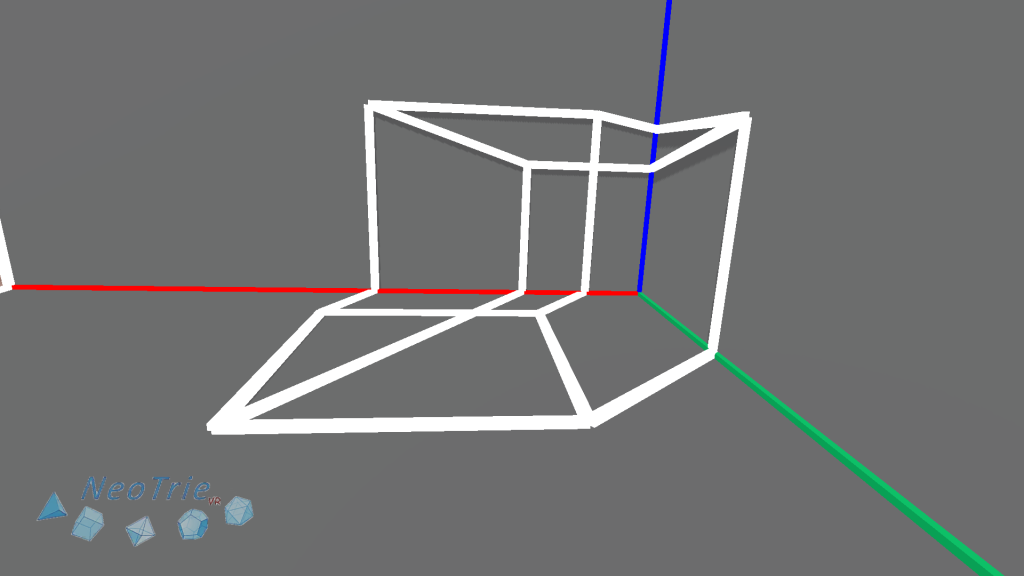
Activity 7: Victor Vasarely's artwork in 3d.
This activity is based in the well known cubism art work by Vasarely. The aim is to understand why he could draw such a nice projection of a 3d figure made by joining cuboids.
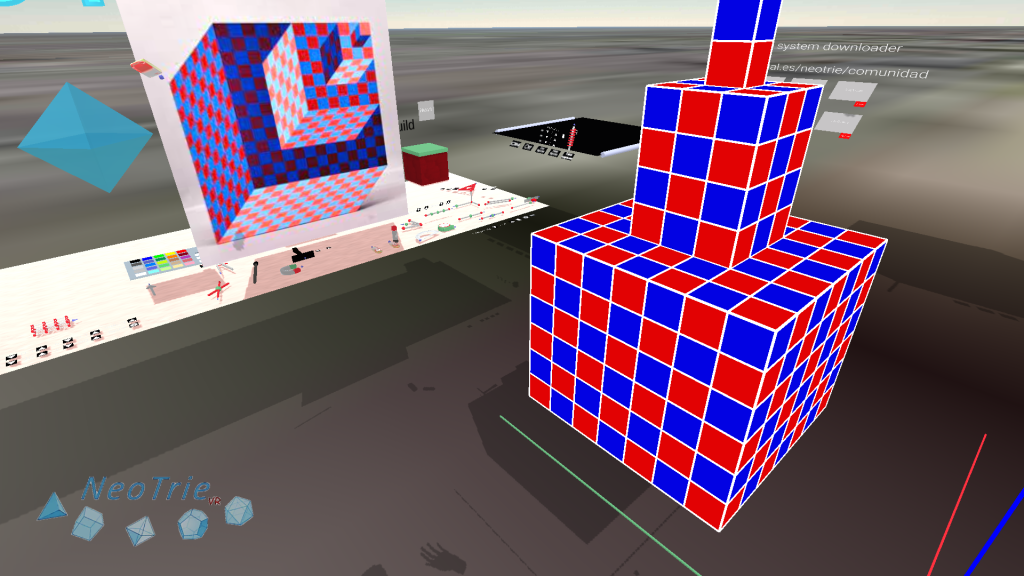
Construction instructions:
- Use the cuboid's tool to make cuboids 1x1x2, 3x3x4, 7x7x6 (and 13x13x8 for a PC version). Move the panels and join the vertices to glue them.
- Paint the faces accordingly (hiding the vertices and edges). The cuboids tool will use by defect the blue and red colors. But can choose other colors. Delete the joining squares to look from inside.
Geometrical problem:
- Given a figure and an external edge between two points of it, how can one rotate the figure to get that edge projected into a point on a fixed plane?
- Apply the previous solution to get Vasarely's view. Use the rotation tool with the correct angles.
A last question:
- What would be the next cuboid added to the base? Find a general formula.
Activity 8: Stereographic projection from sphere to plane, and viceversa.
The stereographic projection is well understood in this special VR scene of Neotrie, where points and lines are interactable, they can moved to see their effect, either from the sphere to the plane or viceversa. Students can be also asked to build out this projection from an empty scene, by using the compass tool to make a sphere, and the intersection tool to find the corresponding projections into a given plane.
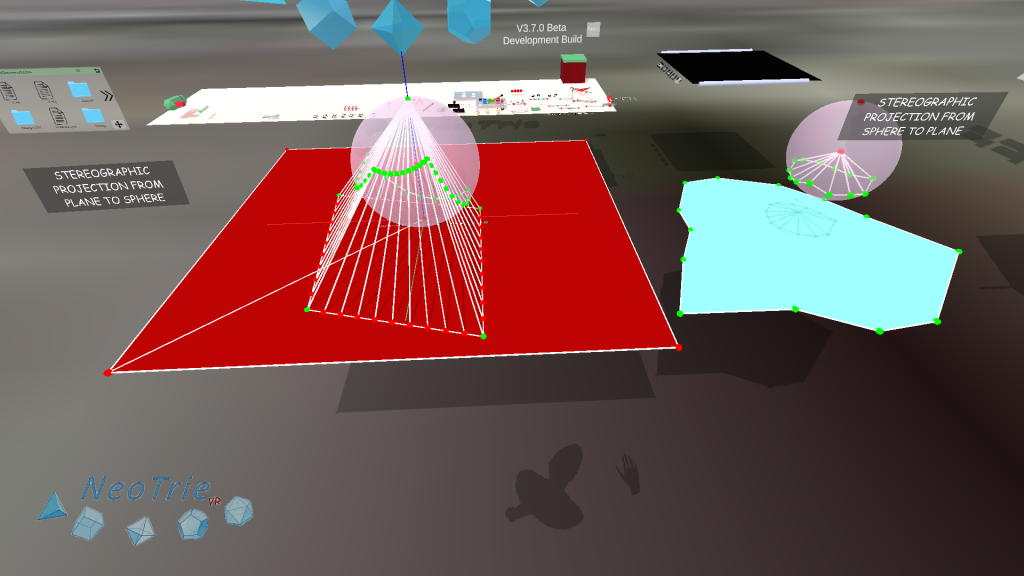
Instructions:
- Move the center of the sphere, the radius, the plane, and the vertices either in the plane or the sphere to get different projections.
- Build the projection of a general point by using the intersection tool.
- Find that lines (segments) go to circles (arcs) on the sphere. Circles will be send to circles in general. Angles between two curves are preserved (although here, the angle would be approximated, as we work with lines that approximate curves).
Artwork: Try to make some nice figure in the plane and its projection in the sphere.
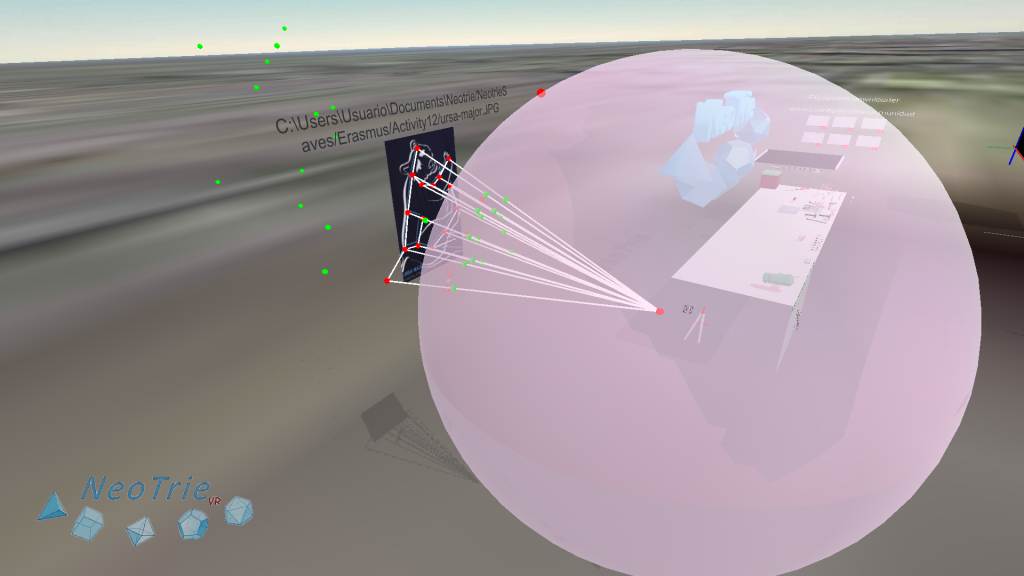
Activity 9: Constellations.
In this activity we see how the stars in a constellation might be far from each other in depth. Starts are projected in a sphere, which represents our celestial sphere. This has a radius so big, that it can be considered locally flat.

Activity 10: Crystals.
Make the 7 crystal systems and the 14 Bravais crystal lattices with the nets generator tool. Find and include examples in nature.
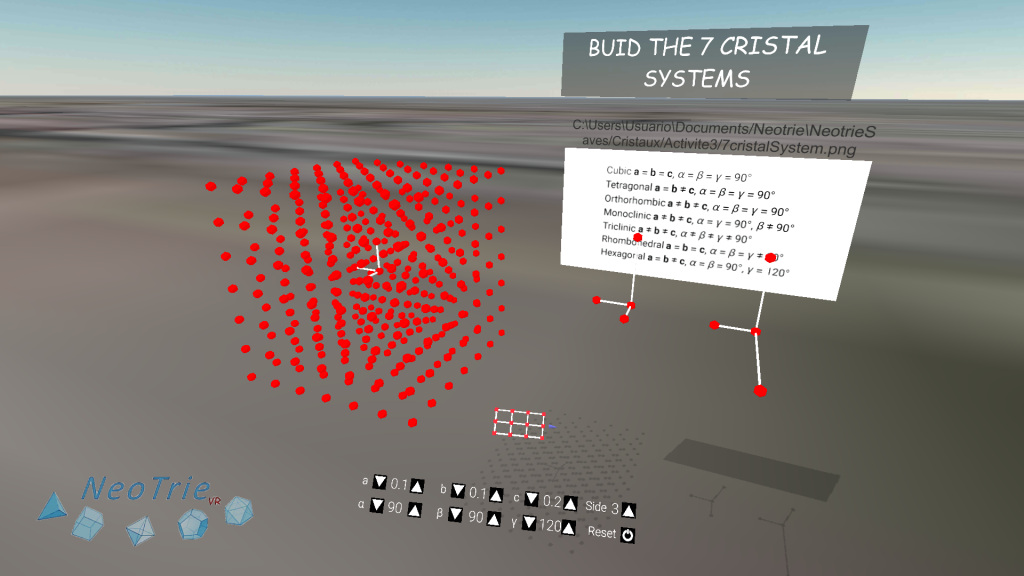
Visit our project about crystals made in collaboration with the Palais de la Découverte
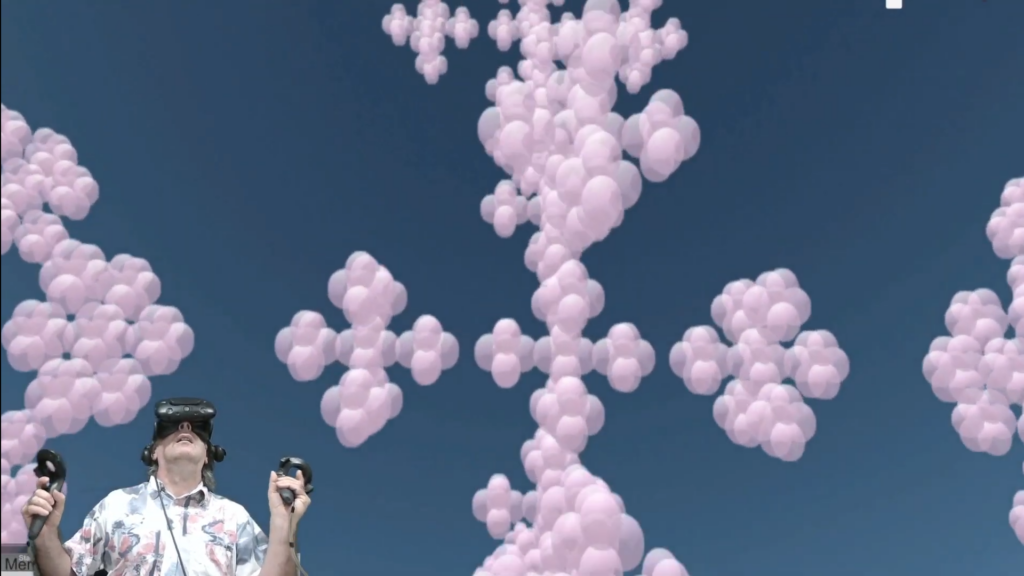
Activity 11: Fractals.
The new fractal tool will allow us to generate self-similar fractals easily. Students will have to enter the generation parameters (given in the first iteration) into the tool. Press on the image to get more information:
Activity 12: Knots and links.
Students draw knots and links on a picture of the Rolfsen table. They can add gravity to it, color them, and get deeper in how they can be generated.
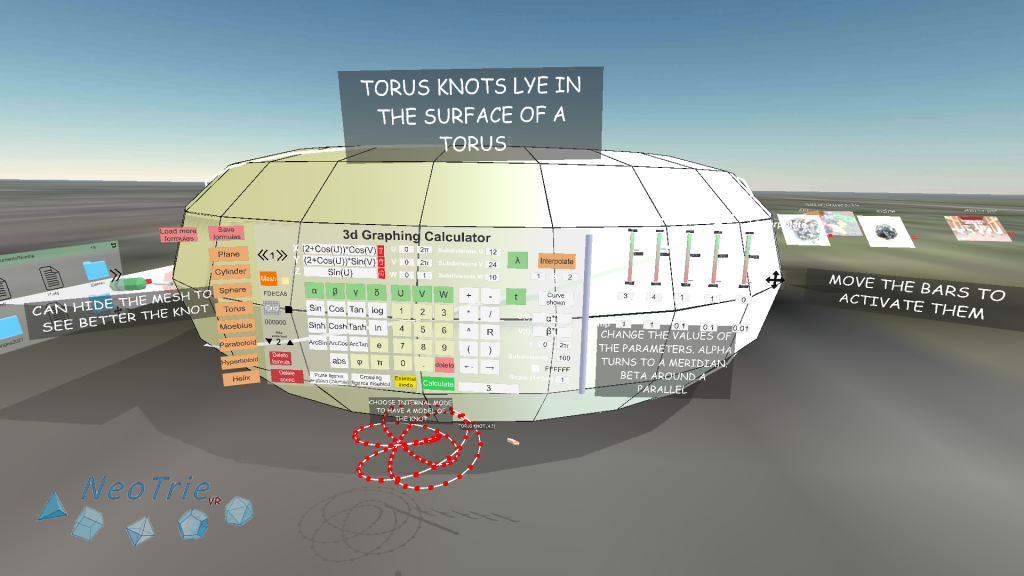
Activity 13: Torus knots.
The graphing calculator permits to visualize with surfaces and curves on them, from their parametric equations. In this activity students discover the mathematics of the torus knots given by a pair of numbers: one which tells us the number of turns around a meridian, and the other to a parallel.
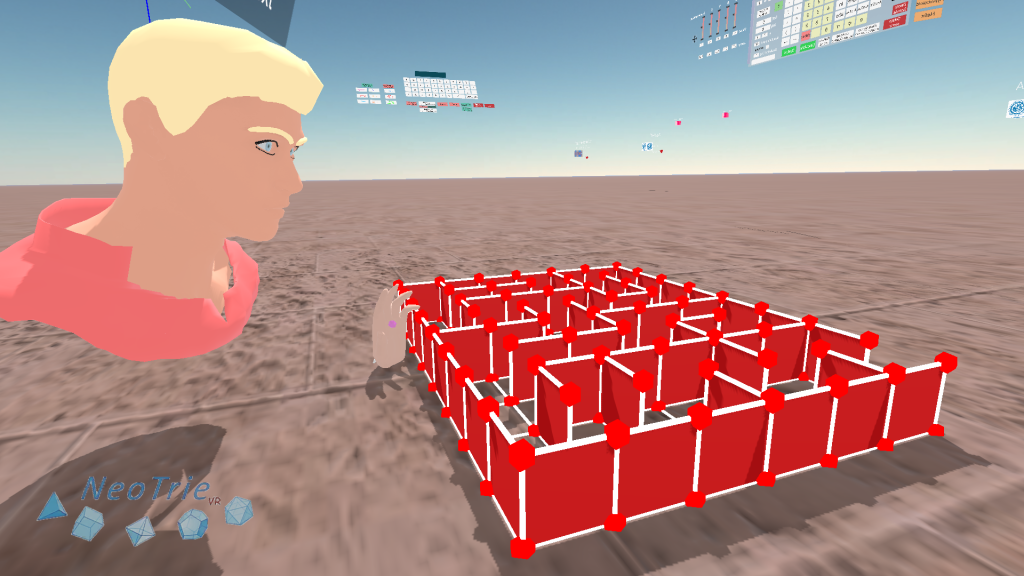
Activity 15: Labyrinths.
Make your own labyrinth to play with your classmates!
Use the paste and copy tool to make a grid of cubes. Delete the desired faces to make the labyrinth, and make it bigger with the scale copy tool. Are you ready to play! You are not allowed to fly of course!

Try also this 3d labyrinth of 4 floors!
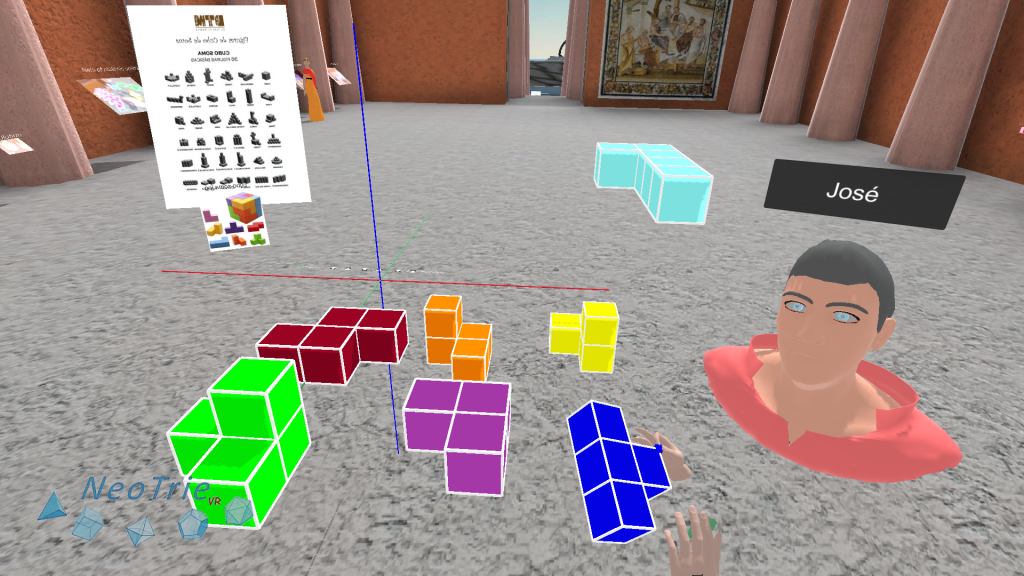
Activity 17: Puzzles.
Build and play with puzzles in 2d and 3d, like the tangram, or the soma cube. Recall to restrict the moves to 0.1 and rotations to 90 degrees, on each axis. Also disable Allow Paste in Menus>Other settings.
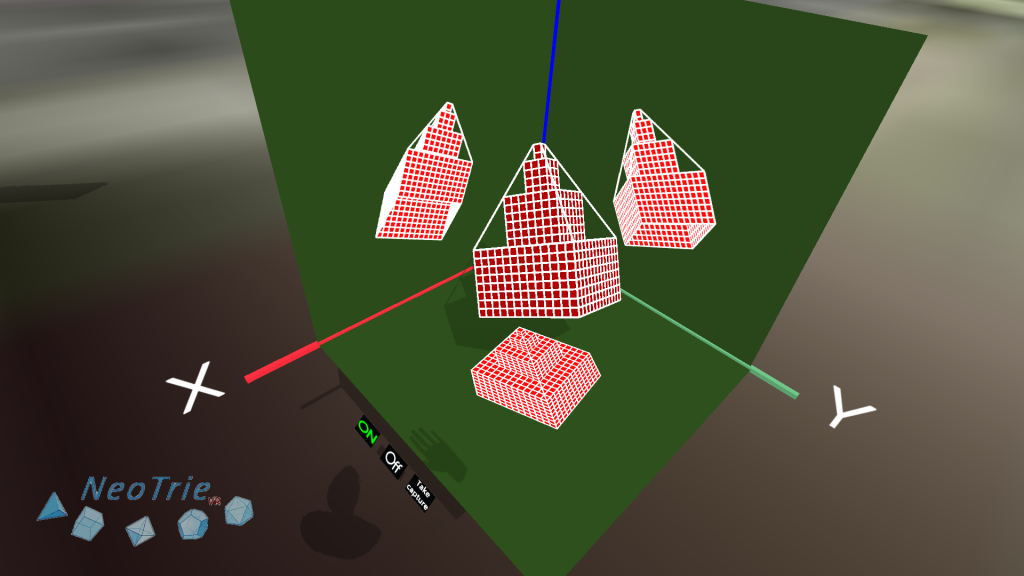
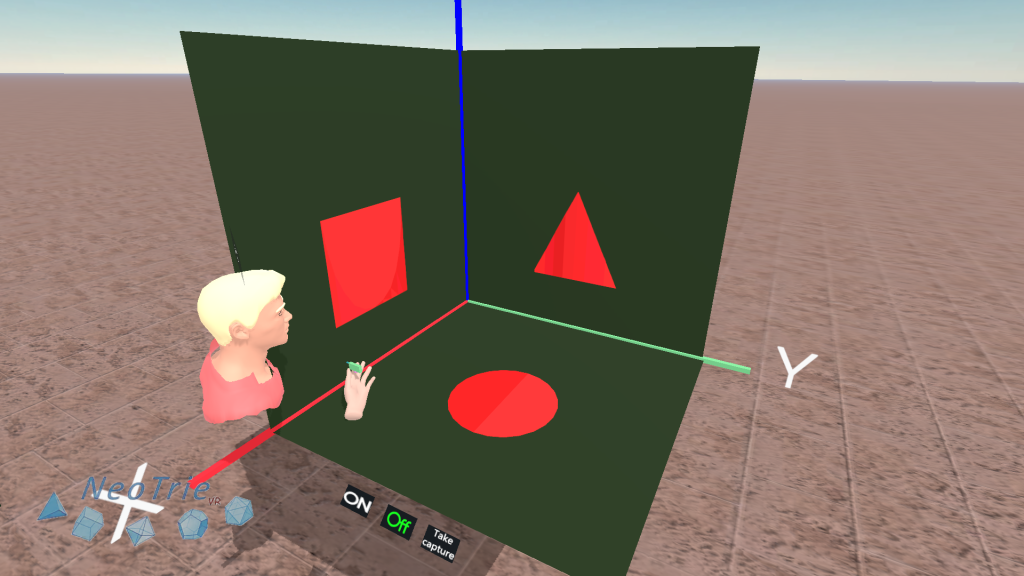
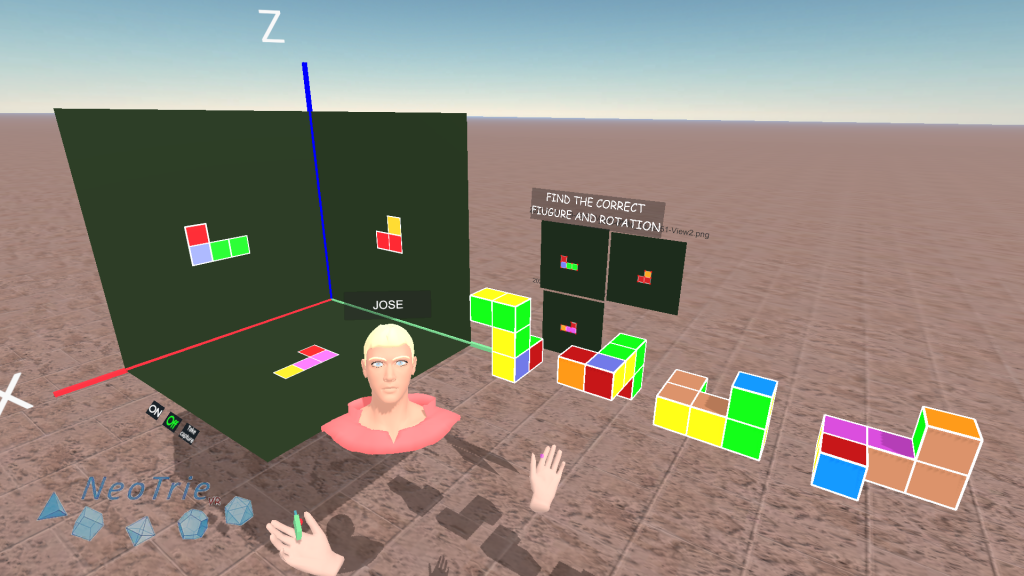
Activity 18: Projections in the multiviews planes.
Further activities:
- Construct a figure with given projections.
- Ask your students to invent their own multiviews projection problems to play with other classmates.
Activity 19: Anamorphoses.
In the next activity, students will learn how to build an anamorphosis of the cube in two different ways.
Know more about Dürer machine. https://www2.ual.es/neotrie/perspective-of-a-prism-by-durer/
Activity 20: Illusions.
Choose your favourite illusion and try to build it in Neotrie with the help of your classmates. You can download the figures below as examples directly in the box of Erasmus activities.
Activity 21: Solar system.
Use the sphere tool to build a scaled copy of the solar system, and the scale copy tool, to introduce the rations for distances and diameters. Get the measures from the corresponding IO1 activity or https://www.jpl.nasa.gov/edu/learn/project/make-a-scale-solar-system/
Activity 22: Symmetries.
(Advanced license) Use the optional Parallel, Rotate and Mirror tool buttons to make symmetries of a figure. In this advanced option, the copies depend on the original, so you can vary the copy and see the changes in the symmetrical copies.
Activity 23: Friezes.
In multiplayer mode, make the 7 friezes, starting with a single piece. Use the copy tool to make copies of it, and the rotation and mirror tool to rotate or reflect the copies correctly before moving them to form a frieze.
Advanced: Use the optional buttons of the translation, mirror and rotation tools.
Activity 24: Periodic tilings.
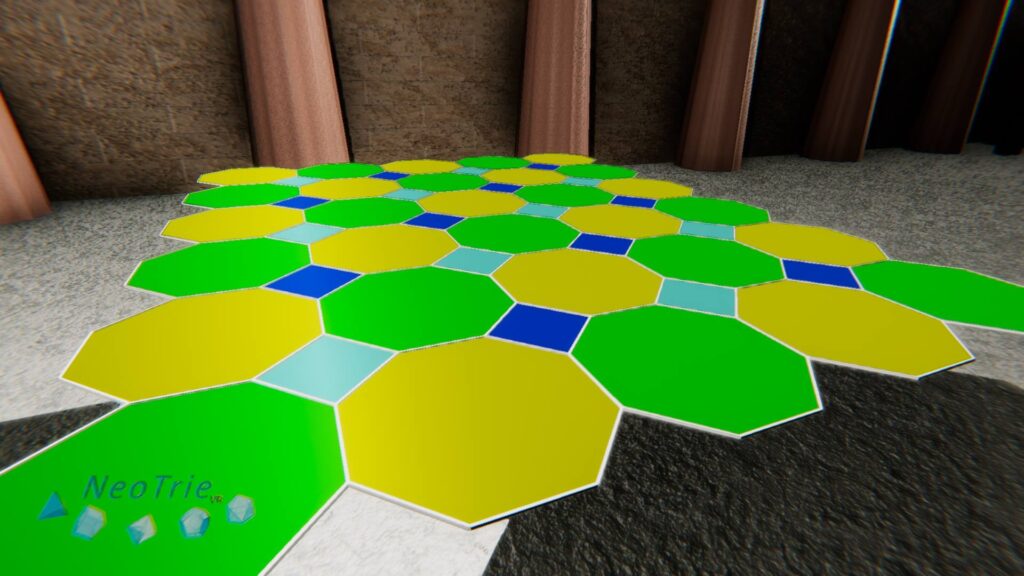
In multiplayer mode: Build periodic regular tilings with triangles, squares and hexagons.
In multiplayer mode: Build some archimedean tilings.
Students can include some pictures from the tiling they want to construct Wikipedia.
Here ar some tilings already made. The number 488 indicates that around a vertex one finds one square and 2 octagons, in this order.
One can use the rotation tool to rotate the pieces by correct angles, or just can use the magnet tool for that.
Paint them in collaboration with the minimum number of colors (it will be less or equal than 4, thanks to the theorem of 4 colours), so that the regions with some common side have different colors.
Look at other tessellations in our community.
Activity 25: Pendulums.
In this activity, students learn how to build a pendulum: make a circle, and use the slider tool to get a point moving automatically on a circle at constant speed. Then project this point on the base tangent of the circle, and use the intersection tool to get back a point on the circle, which gives the move of the pendulum.
Activity 26: Music and geometry.
In the music box you will find a diatonic scale music balls.
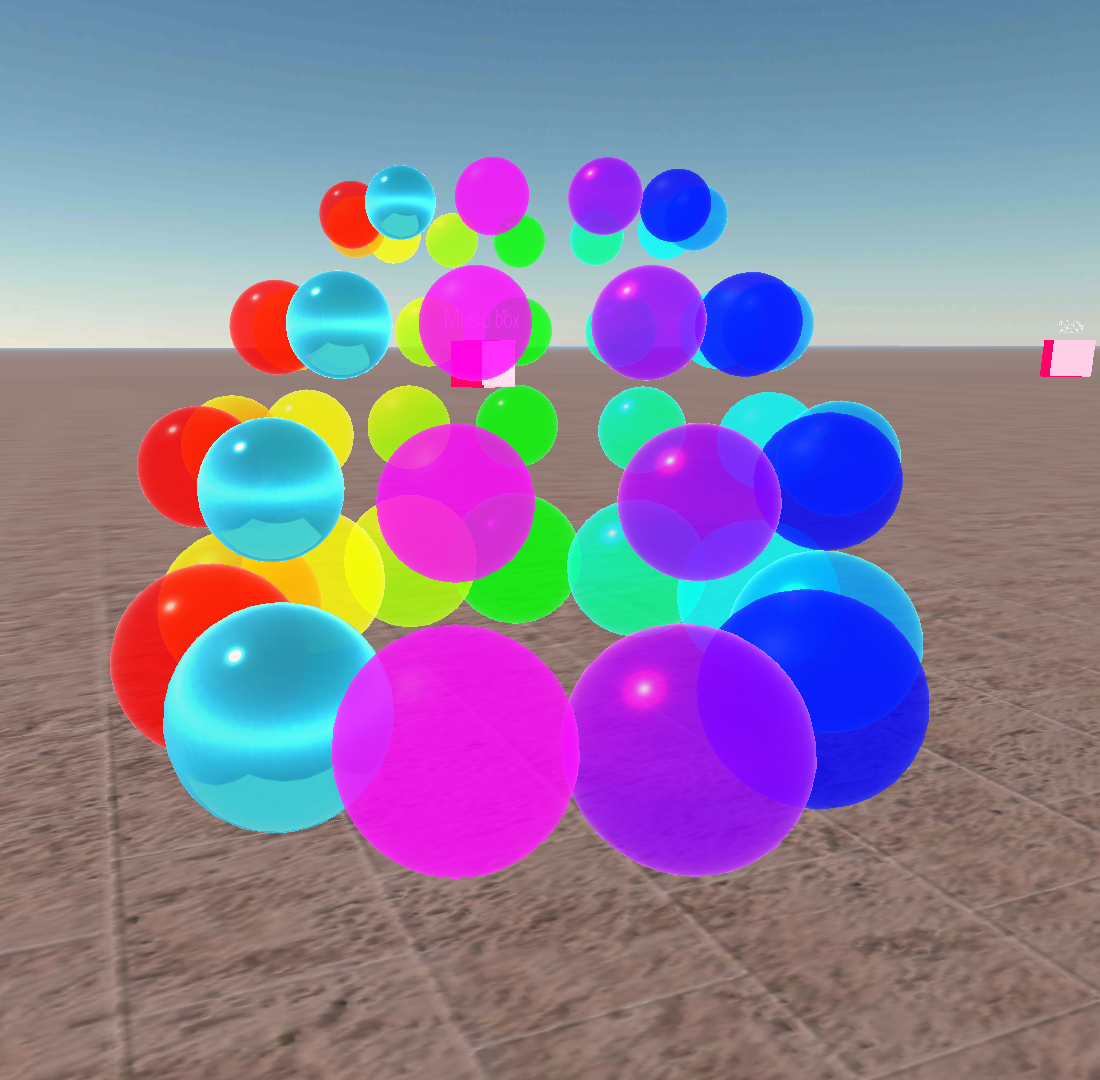
You have 4 music wheels (larger balls give lower musical pitch) with the 12 semitones ordered by colours, which correspond with the RGB chromatic wheel, starting with red at C.
Once it is understood how the 12 semitones works, there are plenty of activities for our pupils to connect geometry and music. One can study, for instance, the connections between polygons and major and minors chords in a tone. We consider C as main tone (This can be transposed to other tones by simply rotating the wheel).
- Which triangles jumps give us major chords? For example, major chord C is CEG
- Which triangles jumps give us minor chords? For example, minor chord a is AB
- Play the C major chords F, C, G, and minor chords d, a, e.
- Build the circle of fifths by jumping 5 semitones.
- Make a slider point moving cyclically on the vertices of a regular dodecagon, jumping 1, 2, 3, 4, 5, 7 steps to obtain different arpeggios and known scales (visit this page).

And of course, one can make copies of each music ball (with the copy tool) to play a song with the hands (or free drawings as sticks).
Can charge some dumb sounds on cylinders (or other STL objects) to play with further percussion.
ENJOY GEOMETRICAL MUSIC!!
Activity 27: 3d printing.
Make your own figure to print:
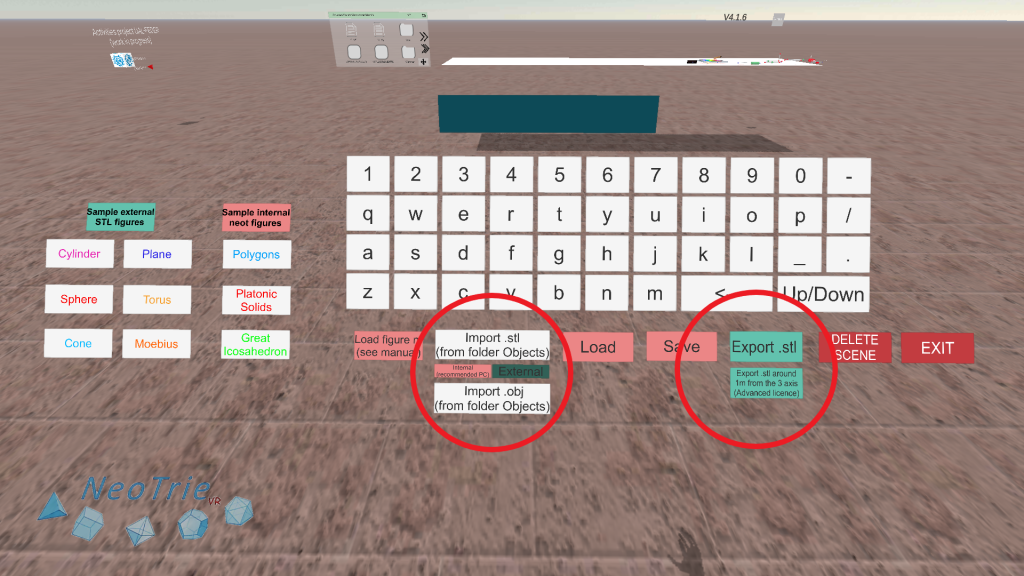
- Create your favourite figure with faces and Export it as an STL file.
- Use the 3d Graphing calculator to produce a surface in internal mode. Then use Export to STL.
Import a STL file from other softwares
- Copy your STL file in the folder Neotrie>Objects.
- If it has not too many triangles, import it with Internal mode.
- Edit it with the hand actions.
- Export it as STL to print out in a 3d printer.
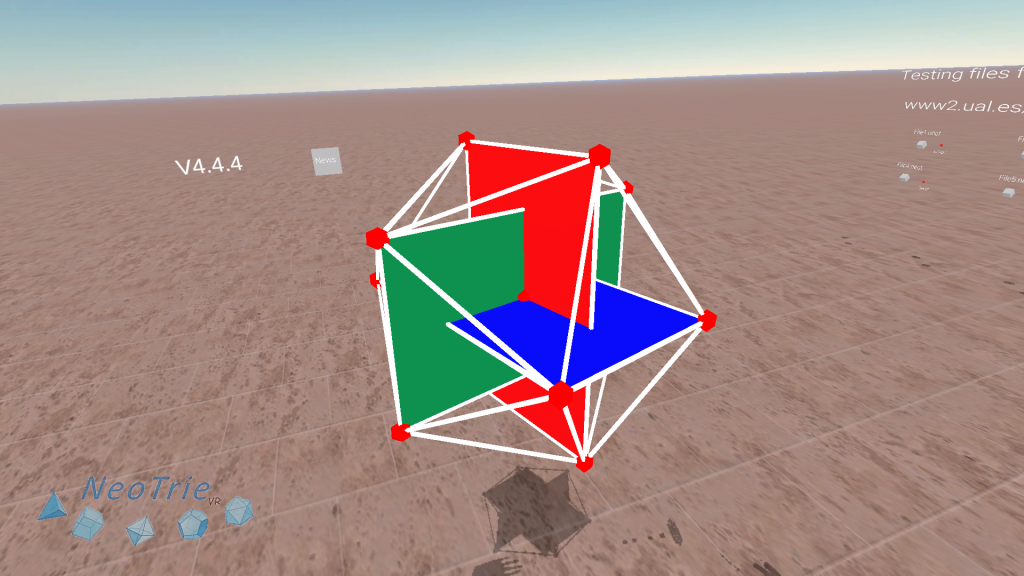
Activity 28: Icosahedron from golden rectangles.
Build a golden rectangle with the compass tool. Make 3 copies and cross them perpendicularly to get the vertices of the icosahedron. Then make the 20 faces of the icosahedron. Press on the image to get a step by step construction.
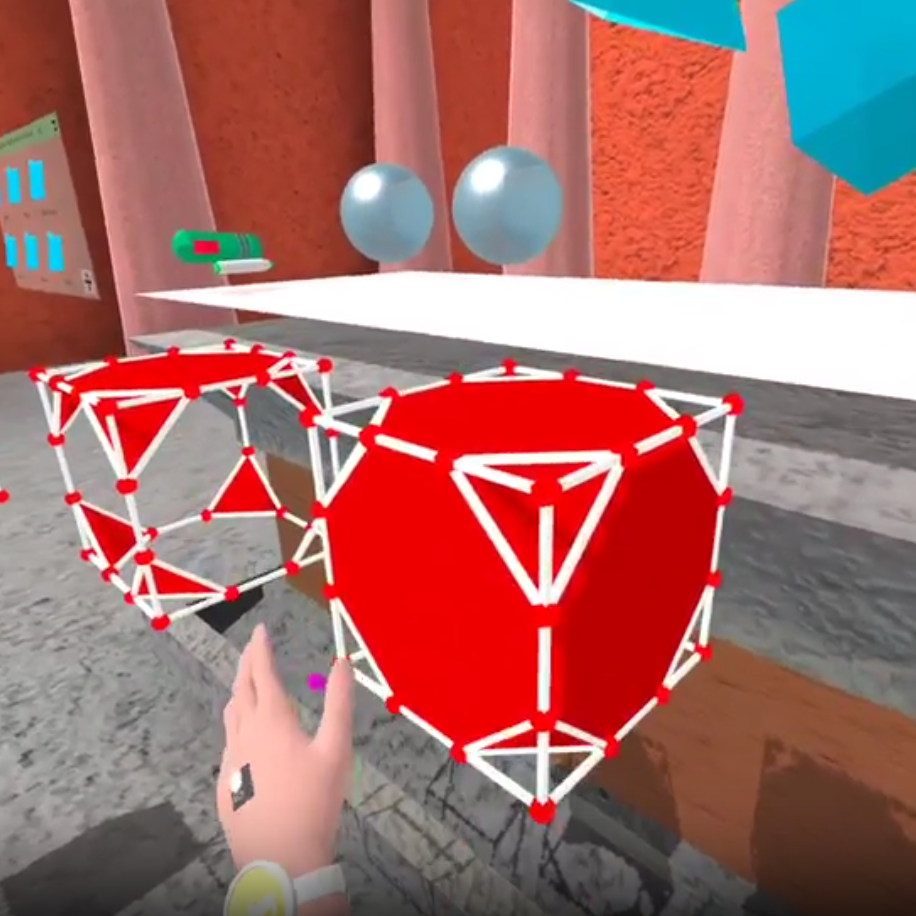
Activity 29: Truncated polyhedra.
This is an activity on semi-regular polyhedra using the subdivision tool. Click on the image for instructions.
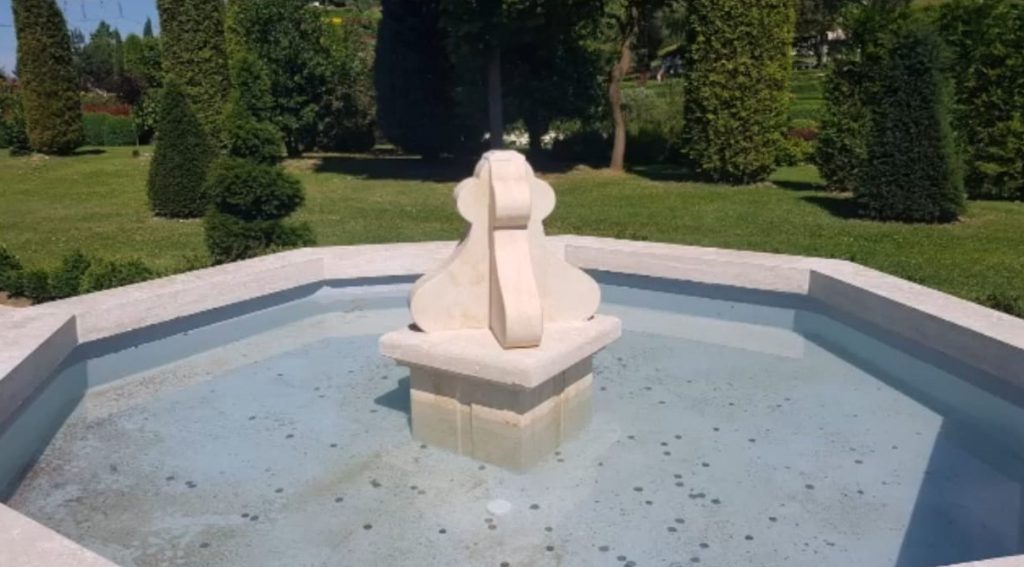
Activity 30: Garden fountain.
The fountains have rotational symmetries that make their construction easier. In this free activity we propose that students build their own font with the tools available in Neotrie.
Activity 31: Coloring.
Free game with colors in multiplayer mode.
- Make your own favourite map (or load a polyhedra from the Gallery of figures) and color it following the rules of the 4 colour theorem.
- Play the "4 colour theorem" game in a graph. For that chose this mode in Games available in the menu. In this case we play with the dual graph, that is, regions of the map correspond to vertices, and adjacent regions correspond to an edge connecting the two vertices.